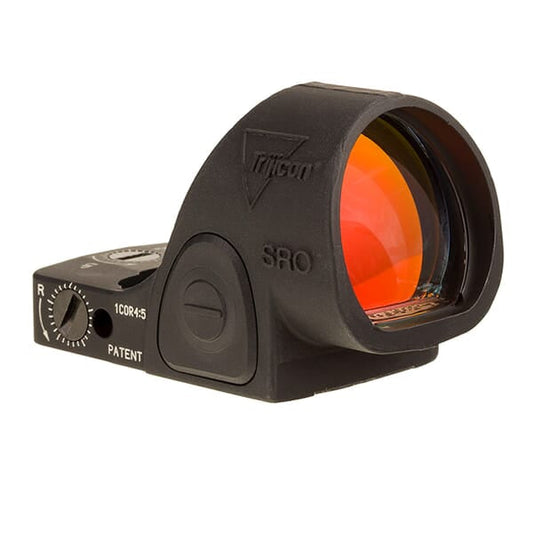
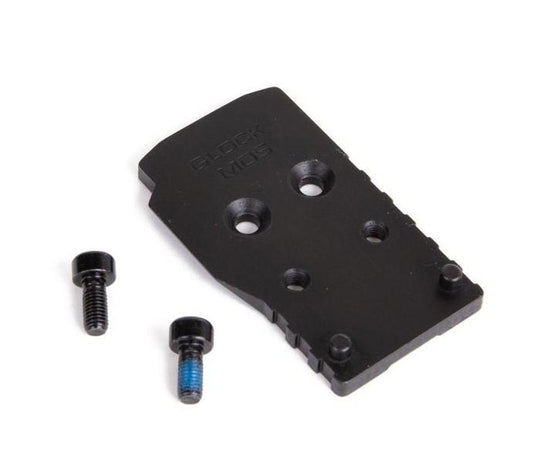
Sig Sauer ROMEO1 Handgun Mounting Kit Glock MOS SOR1MK011

Sig SauerSKU: SOR1MK011

✅Guaranteed FREE Shipping & Handling
✅Use Code 30OFF To Get $30 Off Orders Over $500
✅Best Online Price, Guaranteed

Limited Stock On Hand. Order Now Before They’re Gone

Price:
Sale price$51.99

Description

If you're looking to elevate your shooting precision, the Sig Sauer ROMEO1 Handgun Mounting Kit Glock MOS SOR1MK011 is just what you need. This factory replacement kit is designed specifically for the ROMEO1 and ROMEO1 PRO, ensuring an effortless fit and seamless integration with your Glock MOS system. Say goodbye to mounting headaches and hello to enhanced accuracy at the range or during tactical situations.

Engineered for durability and reliability, this mounting kit allows for quick attachment and detachment, keeping your focus on what matters most—your aim. Whether you're a seasoned shooter or just starting to explore the world of precision shooting, this mounting kit is your companion for ultimate firearm performance.

Features – Key Benefits Bullets

  • PREMIUM MATERIALS for superior durability and extended lifespan.
  • PRECISION ENGINEERED to ensure flawless fit with ROMEO1 and ROMEO1 PRO.
  • QUICK INSTALLATION designed for easy attachment and detachment.
  • OPTIMIZED FOR GLOCK MOS to enhance your shooting experience.
  • LIGHTWEIGHT DESIGN to maintain firearm balance without added weight.
  • SECURE LOCKING MECHANISM prevents any movement during use.
  • EASY TO USE even for those new to mounting optics.
  • VERSATILE COMPATIBILITY suitable for various shooting scenarios.

Technical Specifications Table

Specification Details
Compatibility ROMEO1, ROMEO1 PRO
Material Aluminum
Weight Lightweight
Dimensions Standard Glock MOS dimensions

What’s in the Box?

  • Sig Sauer ROMEO1 Handgun Mounting Kit
  • Installation tools
  • User manual

Customer Reviews

"Installation was a breeze and it fits perfectly on my Glock. Highly recommend!"
"Solid construction and excellent craftsmanship. My aim has improved!"
"Best mounting kit for the ROMEO1 I've used so far. Worth every penny!"

FAQ

1. How does the Sig Sauer ROMEO1 Handgun Mounting Kit enhance performance? This mounting kit is precision-engineered to fit perfectly with the ROMEO1 and ROMEO1 PRO, ensuring that your optics remain securely in place, allowing for improved accuracy and target acquisition.

2. Is the installation process complicated? Not at all! The mounting kit includes all necessary tools and a user manual, making installation quick and straightforward, even for those new to optics.

3. What kind of maintenance does this kit require? Regular checks for secure fittings and cleaning to remove debris will keep your mounting kit in optimal condition. It's designed for easy upkeep.

Similar Models

Looking for more options? Explore our extensive collection of Sig Sauer accessories tailored for your shooting needs, including the Sig Sauer P320 Mounting Kit for versatility and enhanced performance. Check out our full lineup for the ultimate shooting experience.

Our Guarantees

FREE Fast Shipping Over $99

Enjoy complimentary expedited shipping on all orders over $99.

Secure Payments

Shop with confidence using our encrypted payment processing.

High Quality or Money Back

Not satisfied with your purchase? We'll refund your money, no questions asked.

Top-Notch Support

Our expert team is available to answer all your questions and provide assistance.

What Our Customers Say

"I've been hunting for over 20 years and this is by far the clearest scope I've ever used. The glass quality is exceptional and the low-light performance is outstanding. Took it on a dawn elk hunt and could see perfectly."
Michael T.
Verified Buyer | Professional Hunter
"As a competitive shooter, I need precision I can count on. This scope delivers exactly that. The turrets have perfect tactile feedback, tracking is spot-on, and the zero has held perfectly through thousands of rounds. Worth every penny."
Sarah K.
Verified Buyer | Competition Shooter
"I was skeptical about spending this much on a scope, but after using it for a season, I can say it's the best investment I've made for my rifle. The clarity is unmatched and the illuminated reticle is perfect for low light conditions."
Robert J.
Verified Buyer | Recreational Hunter
"As a law enforcement officer, I need gear I can trust with my life. This optic has been through rain, mud, and extreme temperatures without missing a beat. The glass clarity is exceptional and the durability is unmatched."
David M.
Verified Buyer | Law Enforcement

Optics Knowledge Center

Understanding Rifle Scope Basics

Magnification

Magnification refers to how much larger an object appears through the scope compared to the naked eye. Fixed power scopes have one magnification setting, while variable power scopes offer a range (e.g., 3-9x).

Objective Lens

The objective lens is the front lens that gathers light. Larger objective lenses (measured in mm) gather more light, providing brighter images in low-light conditions but add weight and require higher mounting.

Reticle

The reticle (crosshair) is the aiming point inside the scope. Modern scopes offer various reticle designs, from simple duplex crosshairs to complex ballistic reticles with holdover points for different distances.

Adjustments

Rifle scopes have turrets for windage (horizontal) and elevation (vertical) adjustments. These are measured in MOA (minutes of angle) or MRAD (milliradians) and allow precise aiming adjustments.

Proper Scope Mounting Guide

1
Select the Right Rings & Base

Choose rings that match your scope's tube diameter (typically 1", 30mm, or 34mm). Select a base compatible with your rifle's receiver. For heavy-recoiling rifles, opt for stronger mounts.

2
Install the Base

Clean the receiver and base thoroughly. Apply a small amount of blue Loctite to the screws. Attach the base to the receiver and torque the screws to manufacturer specifications.

3
Attach the Rings

Attach the bottom halves of the rings to the base. Place the scope in the rings and loosely attach the top halves. Don't fully tighten yet.

4
Set Eye Relief & Level

Position the scope for proper eye relief (3-4 inches) in your normal shooting position. Ensure the reticle is level using a scope leveling tool. Once positioned correctly, tighten the rings evenly in a cross-pattern.

Scope Zeroing Tips

Start Close

Begin zeroing at a shorter distance (25-50 yards) to ensure you're on paper before moving to your desired zero distance (typically 100 yards).

Use a Stable Rest

Always zero your rifle from a stable shooting position using a bench rest, sandbags, or a shooting rest to eliminate as much human error as possible.

Fire Groups

Fire 3-shot groups before making adjustments. This provides a more accurate representation of where your rifle is shooting than single shots.

Make Deliberate Adjustments

Know your scope's adjustment values (typically 1/4 MOA per click). If your group is 2 inches low at 100 yards, you'll need to adjust up 8 clicks (for a 1/4 MOA scope).

Confirm Your Zero

After making adjustments, fire another group to confirm your zero. Repeat the process until your point of impact matches your point of aim.

Document Your Settings

Once zeroed, record your settings including distance, ammunition used, and environmental conditions for future reference.

Optics Maintenance & Care

Cleaning Lenses
  • Start by blowing or brushing away loose particles
  • Use a lens pen or microfiber cloth for fingerprints
  • For stubborn dirt, use lens cleaning solution (never household cleaners)
  • Clean with gentle circular motions from center outward
Protecting Your Optics
  • Always use lens caps when not in use
  • Store in a dry place with silica gel packets
  • Avoid extreme temperature changes
  • Use a quality scope cover in harsh conditions
Regular Maintenance
  • Check and tighten mount screws periodically
  • Inspect O-rings and seals for damage
  • Verify zero after rough handling
  • Clean the exterior with a damp cloth
What to Avoid
  • Never use fingers to touch lenses
  • Avoid paper products (tissues, paper towels) on lenses
  • Don't use acetone, alcohol, or household cleaners
  • Never disassemble your scope (voids warranty)

You may also like