Description
When the sun dips below the horizon, hunting continues with the 
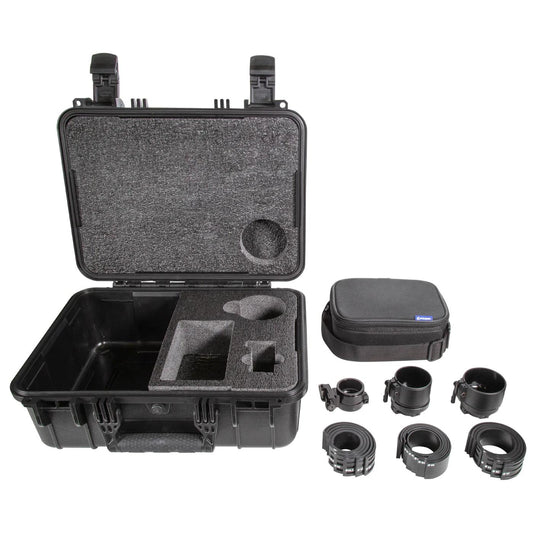
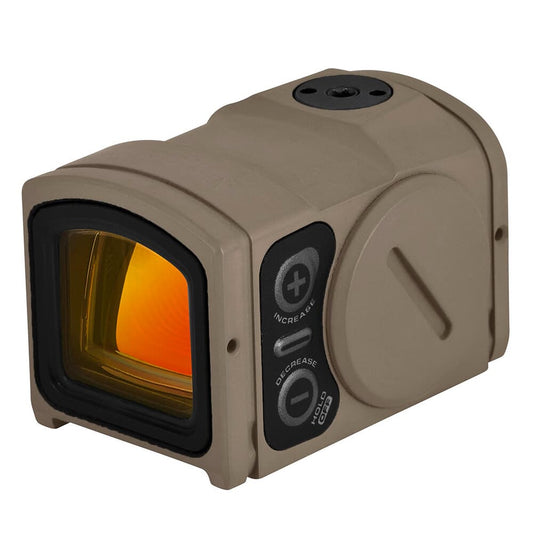
Pulsar Proton FXQ30 Thermal Imaging Front Attachment Kit. This innovative clip-on thermal attachment seamlessly converts your daytime scope into a cutting-edge thermal sight, all while maintaining the balance and integrity of your rifle setup. Whether you’re delving into the wilderness for precision shooting or tracking game at midnight, this device offers unmatched versatility. With compatibility for scopes ranging from 1.5x to 4x magnification and 40mm to 56mm lenses, you can easily elevate your long-range optics capabilities without a hitch.
Imagine focusing on targets just 15 meters away, thanks to the Proton FXQ30’s focus-free thermal lens. Capture every thrilling hunt with its integrated photo and video recording feature, which includes 16 GB of internal memory. Plus, the optional Bluetooth remote control means you can adjust settings on-the-fly without missing a beat. Lightweight and ruggedly built to endure various weather conditions, the Proton FXQ30 is your essential companion as you aim for the stars in your hunting adventures.
Features – Key Benefits Bullets
- LIGHTWEIGHT DESIGN for easy portability, ensuring your rifle remains balanced during long hunts.
- QUICK MOUNTING with the PSP adapter allows for rapid setup without compromising zeroing.
- UNMATCHED VERSATILITY compatible with a wide range of daytime scopes, enhancing your tactical options.
- FOCUS-FREE THERMAL LENS keeps targets sharp from 15 meters, letting you focus on your hunt.
- PREMIUM IMAGE QUALITY with a 384x288 px sensor and 8 color palettes for clear thermal imaging.
- INTEGRATED RECORDING captures every moment with 16 GB internal memory for photos and videos.
- BLUETOOTH CONTROL offers hands-free operation, letting you manage settings without distraction.
- DURABLE BUILD is shockproof and waterproof (IPX7), ensuring longevity through various conditions.
Technical Specifications Table
Feature | Details |
---|---|
Magnification | 1.5x - 4x |
Lens Diameter | 40mm - 56mm |
Weight | Lightweight |
Waterproof Rating | IPX7 |
Sensor Resolution | 384x288 px |
Memory | 16 GB internal |
What’s in the Box?
- Pulsar Proton FXQ30 Thermal Attachment
- PSP Adapter
- USB Charging Cable
- User Manual
- Protective Lens Covers
Customer Reviews
"The Proton FXQ30 has completely changed my night hunting game. Installation was a breeze!"
"Incredible clarity and ease of use. I'm impressed with how well it fits with my existing scope."
FAQ
How does the Proton FXQ30 perform in low-light conditions? The Proton FXQ30 excels in low-light conditions, leveraging its advanced thermal technology to provide clear imagery, making it an invaluable tool for nocturnal hunting.
Can I use the Proton FXQ30 with any scope? This thermal imaging attachment is compatible with most scopes featuring a lens diameter from 40mm to 56mm, allowing for a versatile hunting setup.
Similar Models
Looking for additional thermal options? Explore our extensive Pulsar lineup, featuring models like the Pulsar Helion 2 for handheld thermal imaging and the Pulsar Thermion series for integrated thermal scopes. Discover the perfect optics tailored to your hunting adventures.
Our Guarantees
FREE Fast Shipping Over $99
Enjoy complimentary expedited shipping on all orders over $99.
Secure Payments
Shop with confidence using our encrypted payment processing.
High Quality or Money Back
Not satisfied with your purchase? We'll refund your money, no questions asked.
Top-Notch Support
Our expert team is available to answer all your questions and provide assistance.
What Our Customers Say
Optics Knowledge Center
Understanding Rifle Scope Basics
Magnification
Magnification refers to how much larger an object appears through the scope compared to the naked eye. Fixed power scopes have one magnification setting, while variable power scopes offer a range (e.g., 3-9x).
Objective Lens
The objective lens is the front lens that gathers light. Larger objective lenses (measured in mm) gather more light, providing brighter images in low-light conditions but add weight and require higher mounting.
Reticle
The reticle (crosshair) is the aiming point inside the scope. Modern scopes offer various reticle designs, from simple duplex crosshairs to complex ballistic reticles with holdover points for different distances.
Adjustments
Rifle scopes have turrets for windage (horizontal) and elevation (vertical) adjustments. These are measured in MOA (minutes of angle) or MRAD (milliradians) and allow precise aiming adjustments.
Proper Scope Mounting Guide
Select the Right Rings & Base
Choose rings that match your scope's tube diameter (typically 1", 30mm, or 34mm). Select a base compatible with your rifle's receiver. For heavy-recoiling rifles, opt for stronger mounts.
Install the Base
Clean the receiver and base thoroughly. Apply a small amount of blue Loctite to the screws. Attach the base to the receiver and torque the screws to manufacturer specifications.
Attach the Rings
Attach the bottom halves of the rings to the base. Place the scope in the rings and loosely attach the top halves. Don't fully tighten yet.
Set Eye Relief & Level
Position the scope for proper eye relief (3-4 inches) in your normal shooting position. Ensure the reticle is level using a scope leveling tool. Once positioned correctly, tighten the rings evenly in a cross-pattern.
Scope Zeroing Tips
Start Close
Begin zeroing at a shorter distance (25-50 yards) to ensure you're on paper before moving to your desired zero distance (typically 100 yards).
Use a Stable Rest
Always zero your rifle from a stable shooting position using a bench rest, sandbags, or a shooting rest to eliminate as much human error as possible.
Fire Groups
Fire 3-shot groups before making adjustments. This provides a more accurate representation of where your rifle is shooting than single shots.
Make Deliberate Adjustments
Know your scope's adjustment values (typically 1/4 MOA per click). If your group is 2 inches low at 100 yards, you'll need to adjust up 8 clicks (for a 1/4 MOA scope).
Confirm Your Zero
After making adjustments, fire another group to confirm your zero. Repeat the process until your point of impact matches your point of aim.
Document Your Settings
Once zeroed, record your settings including distance, ammunition used, and environmental conditions for future reference.
Optics Maintenance & Care
Cleaning Lenses
- Start by blowing or brushing away loose particles
- Use a lens pen or microfiber cloth for fingerprints
- For stubborn dirt, use lens cleaning solution (never household cleaners)
- Clean with gentle circular motions from center outward
Protecting Your Optics
- Always use lens caps when not in use
- Store in a dry place with silica gel packets
- Avoid extreme temperature changes
- Use a quality scope cover in harsh conditions
Regular Maintenance
- Check and tighten mount screws periodically
- Inspect O-rings and seals for damage
- Verify zero after rough handling
- Clean the exterior with a damp cloth
What to Avoid
- Never use fingers to touch lenses
- Avoid paper products (tissues, paper towels) on lenses
- Don't use acetone, alcohol, or household cleaners
- Never disassemble your scope (voids warranty)