Mission First Tactical Torch Standard Mount - Accepts: 1" 3/4" 5/8" Illumination Device
Regular price
$19.99
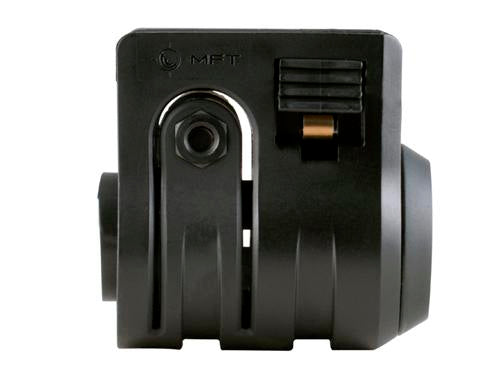
Mission First Tactical Torch Standard Mount is designed to accommodate a range of illumination devices, including 1", 3/4", and 5/8" options. This flexibility makes it ideal for tactical range shooting, night hunting, or outdoor competitions. With two large purchase pads, the mount allows for tool-free quick mounting or reconfiguration on any picatinny rail, enabling seamless transitions in critical moments. The low-profile design ensures that your setup remains streamlined without compromising functionality.
Constructed from high-quality aluminum, this mount offers a robust and durable solution for demanding environments. Its lightweight build minimizes additional weight, making it suitable for extended use without fatigue. Secure mounting prevents unwanted movement, ensuring that your illumination device stays in place, allowing you to focus on your task at hand.
| Specification | Details |
|---|---|
| Material | High-quality Aluminum |
| Weight | 3.5 oz |
| Dimensions | 5.5" x 2" x 1.5" |
| Compatibility | 1", 3/4", 5/8" Illumination Devices |
| Mounting Type | Picatinny Rail |
“This mount has transformed my setup! Easy to install and super secure. Highly recommend!”
“Absolutely love the versatility. It fits all my lights perfectly and is very easy to change.”
“Sturdy and reliable. I’ve used it during night hunts and it performs flawlessly!”
How does the Mission First Tactical Torch Standard Mount compare to other mounts? This mount stands out due to its tool-free installation, accepting multiple sizes of illumination devices. Unlike many alternatives, it offers quick reconfiguration without sacrificing stability.
Is it easy to adjust once mounted? Yes, the design allows for rapid adjustments, making it ideal for tactical situations where speed is crucial. The secure fit means you won't have to worry about your device moving unexpectedly.
Does the mount add significant weight to my setup? The lightweight build of the Mission First Tactical Torch Standard Mount ensures that it won't add unnecessary bulk, making it perfect for long hours of use.
Looking for additional tactical solutions? Explore our comprehensive collection of Mission First Tactical products, including the versatile Mission First Tactical Torch Quick Release Mount for even faster transitions. Discover the full range of mounts and accessories tailored to enhance your tactical experience!
Here’s some of our most similar products people are buying. Click to discover trending style.