MFT Minimalist Appendix IWB Holster Ambi Ruger EC9/EC9s/LC9/LC9s
Regular price
$34.99
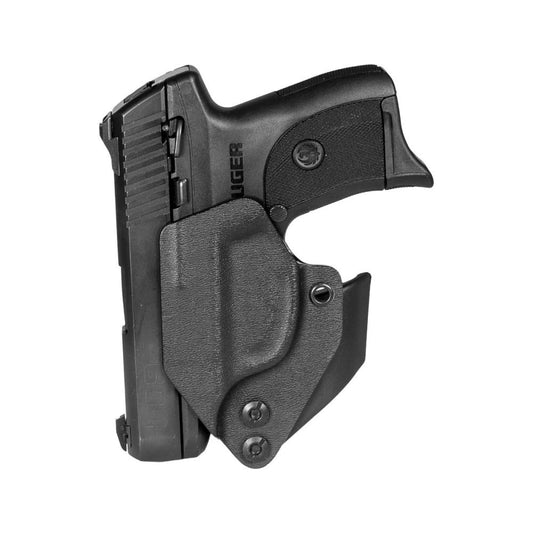
Mission First Tactical's Minimalist Appendix IWB Holster offers a low-profile design while maintaining the reliability of a full-size holster. This holster is specifically designed for Inside the Waistband (IWB) use in both Appendix and 5:00 positions. It accommodates both right and left-handed users with a simple removal of the claw and adjustment using the provided spacer. The claw, intended for right-handed shooters, ensures the firearm's heel is pressed against the body, significantly reducing printing. The audible click feature provides added side retention, making each draw smooth and secure, perfect for concealed carry.
Handcrafted to precise tolerances, this holster is made from advanced materials for comfortable all-day wear. The included Tuckable Belt Clip fits belts from 1" to 1.5", allowing for easy concealment. For those who prefer a static-line tether, the clip and claw can be removed, providing versatility for secure firearm storage in various locations, such as a nightstand, purse, or vehicle console. For safety reasons, remember to remove the holster from your belt before reholstering.
| Specification | Details |
|---|---|
| Holster Type | Inside the Waistband (IWB) |
| Compatibility | Ruger EC9/EC9s/LC9/LC9s |
| Material | .08 Boltaron |
| Weight | Varies by model |
| Dimensions | Compact design for easy carry |
| Adjustable Cant | 0 - 20 degrees |
| Hand Orientation | Ambidextrous |
| Warranty | Lifetime Warranty |
"This holster is incredibly comfortable! I hardly notice it's there." - Jamie R.
"Great fit for my EC9. The audible click feature is a nice touch." - Mark T.
"The minimalist design really helps with concealment." - Sarah L.
Many customers wonder if the Minimalist Holster is easy to adjust for different carry positions. Yes, the adjustable cant feature allows you to customize the angle of the holster from 0 to 20 degrees. This flexibility enhances comfort and accessibility while carrying.
Another common concern is the safety of reholstering while attached to the belt. For optimal safety, the holster should be removed from the belt before reholstering. This precaution ensures that your firearm remains secure and prevents accidental discharge.
Customers often ask how this holster compares to other options. The Minimalist IWB Holster stands out due to its low-profile design and ambidextrous capabilities, making it suitable for a wider range of users. Its high-quality materials and handmade precision further enhance its reputation for reliability and comfort.
Exploring additional options? Check out Mission First Tactical's extensive lineup, including models like the MFT Minimalist OWB Holster for outside the waistband carry and the MFT Tactical Mag Carrier for convenient magazine storage. Discover the full collection for reliable and versatile tactical gear designed to meet your needs.
Here’s some of our most similar products people are buying. Click to discover trending style.