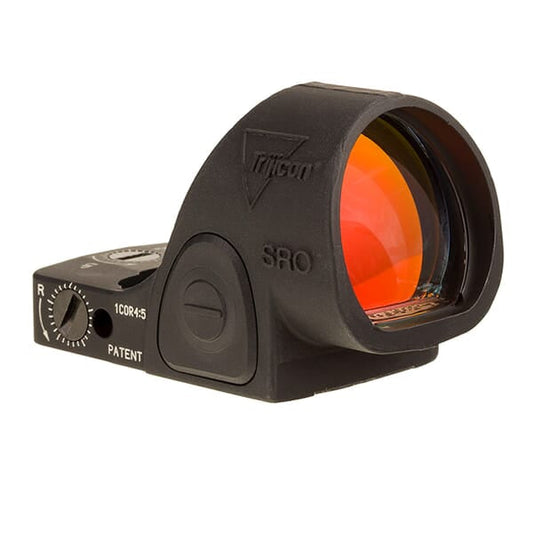
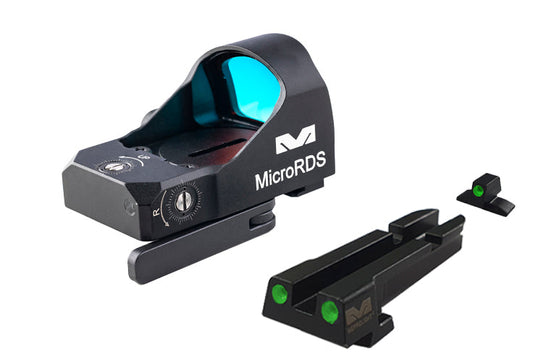
Description
The Meprolight Micro RDS Reflex Sight for IWI Masada pistols is the latest addition to the RDS family. It is designed as a main aiming sight for handguns and a backup for rifles for close distances. It increases your situational awareness by allowing you to keep both eyes open with its large display window and clear red dot for rapid target acquisition. Quick release lets you use the self illuminated backup sights in a quick snap.
PROS:
- Higher precision, Instant target acquisition
- Bigger aiming point helps shooter to overcome vision problems
- MicroRDS with quick release adapter mounts directly to TruDot™ self-illuminated backup night sight
- Both eyes open - Increased situational awareness
- Easier long range engagement
- Battery change does not require removal of sight from slide keeps the sight zeroed at all times
- Adjustable aiming point brightness (doesn’t exist in iron sight)
CONS:
- For some shooters, the sight might change the weight balance of the Handgun
- The sight might not fit all standard holsters
Available Configurations:
Option 1- Full Set
MEPRO MicroRDS Red Dot Sight.
Quick Release Adaptor.
Backup Self-illuminated Night Sight Set.
Option 2- Quick Release Adaptor
Quick Release Adaptor.
Backup Self-illuminated Night Sight Set.
Support Plates.
Option 3- Optical Sight only
MEPRO MicroRDS Red Dot Sight.
Technical Specifications:
Weight (Sight Only) | 37 gr. / 1.3 Oz |
Dimensions (LxWxH) (Sight Only) |
46x 33 x 26 mm
1.8″ x 1.3″ x 1″ |
Window Size | 22.5 x 17.5 mm
0.9″ x 0.7″ |
Aiming Point Diameter | 3 / 6 MOA |
Zeroing Knobs | Horizontal & Vertical |
Click Size | 1 MOA |
Reticule Brightness | 1 x Auto + 3 x Manual |
Battery Type | 1 x CR2032 |
Weapon Adaptor | Weapon Adaptor Adjustable to Most Handguns |
Other | |
Interface | Dovetail (Backup Sight) |
Illumination | Tritium |
Supported Sights Micro red dot sights |
Trijicon RMR, EOTech MRDS, Leopold Delta, Docter, CMORE, Vortex, Burris |
Operation Time |
10 Years (Self-illuminated night 200 hours (continuous, highest brightness) |
Power Saving |
Light sensor, Motion sensor |
Our Guarantees
FREE Fast Shipping Over $99
Enjoy complimentary expedited shipping on all orders over $99.
Secure Payments
Shop with confidence using our encrypted payment processing.
High Quality or Money Back
Not satisfied with your purchase? We'll refund your money, no questions asked.
Top-Notch Support
Our expert team is available to answer all your questions and provide assistance.
What Our Customers Say
Optics Knowledge Center
Understanding Rifle Scope Basics
Magnification
Magnification refers to how much larger an object appears through the scope compared to the naked eye. Fixed power scopes have one magnification setting, while variable power scopes offer a range (e.g., 3-9x).
Objective Lens
The objective lens is the front lens that gathers light. Larger objective lenses (measured in mm) gather more light, providing brighter images in low-light conditions but add weight and require higher mounting.
Reticle
The reticle (crosshair) is the aiming point inside the scope. Modern scopes offer various reticle designs, from simple duplex crosshairs to complex ballistic reticles with holdover points for different distances.
Adjustments
Rifle scopes have turrets for windage (horizontal) and elevation (vertical) adjustments. These are measured in MOA (minutes of angle) or MRAD (milliradians) and allow precise aiming adjustments.
Proper Scope Mounting Guide
Select the Right Rings & Base
Choose rings that match your scope's tube diameter (typically 1", 30mm, or 34mm). Select a base compatible with your rifle's receiver. For heavy-recoiling rifles, opt for stronger mounts.
Install the Base
Clean the receiver and base thoroughly. Apply a small amount of blue Loctite to the screws. Attach the base to the receiver and torque the screws to manufacturer specifications.
Attach the Rings
Attach the bottom halves of the rings to the base. Place the scope in the rings and loosely attach the top halves. Don't fully tighten yet.
Set Eye Relief & Level
Position the scope for proper eye relief (3-4 inches) in your normal shooting position. Ensure the reticle is level using a scope leveling tool. Once positioned correctly, tighten the rings evenly in a cross-pattern.
Scope Zeroing Tips
Start Close
Begin zeroing at a shorter distance (25-50 yards) to ensure you're on paper before moving to your desired zero distance (typically 100 yards).
Use a Stable Rest
Always zero your rifle from a stable shooting position using a bench rest, sandbags, or a shooting rest to eliminate as much human error as possible.
Fire Groups
Fire 3-shot groups before making adjustments. This provides a more accurate representation of where your rifle is shooting than single shots.
Make Deliberate Adjustments
Know your scope's adjustment values (typically 1/4 MOA per click). If your group is 2 inches low at 100 yards, you'll need to adjust up 8 clicks (for a 1/4 MOA scope).
Confirm Your Zero
After making adjustments, fire another group to confirm your zero. Repeat the process until your point of impact matches your point of aim.
Document Your Settings
Once zeroed, record your settings including distance, ammunition used, and environmental conditions for future reference.
Optics Maintenance & Care
Cleaning Lenses
- Start by blowing or brushing away loose particles
- Use a lens pen or microfiber cloth for fingerprints
- For stubborn dirt, use lens cleaning solution (never household cleaners)
- Clean with gentle circular motions from center outward
Protecting Your Optics
- Always use lens caps when not in use
- Store in a dry place with silica gel packets
- Avoid extreme temperature changes
- Use a quality scope cover in harsh conditions
Regular Maintenance
- Check and tighten mount screws periodically
- Inspect O-rings and seals for damage
- Verify zero after rough handling
- Clean the exterior with a damp cloth
What to Avoid
- Never use fingers to touch lenses
- Avoid paper products (tissues, paper towels) on lenses
- Don't use acetone, alcohol, or household cleaners
- Never disassemble your scope (voids warranty)