Description
Product Description
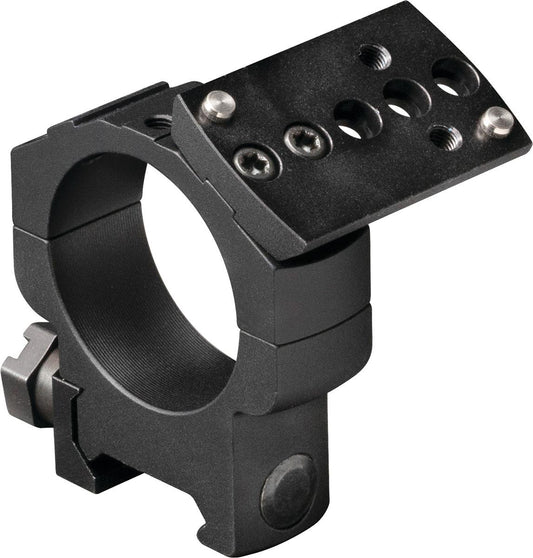
Leupold DeltaPoint Pro 1" Ring Top Mount Kit is engineered for versatility, seamlessly fitting various compatible 1" RDS® Mark 4® and Mark IMS™ mounts. This mount ensures a proper height for your red dot sight, optimizing your shooting experience without adding unnecessary weight. The DP-Pro Iron Sight co-witnesses with the red dot, maintaining functionality even if the battery fails, a crucial feature for reliability in critical situations.
Designed for adaptability, the DP-Pro mount can be installed on any Picatinny, Weaver, or cantilever rail that doesn’t require a riser. For flat-top AR rifles, the DP-Pro riser provides a secure fit. The DeltaPoint Pro 45-degree AR Mount enhances versatility, allowing quick transitions between your magnified optic and red dot sight. With rugged construction and a variety of mounting options, this mount is built to last, ensuring a dependable link between your scope and firearm.
Features:
- VERSATILE MOUNTING for compatibility with multiple RDS® Mark 4® and Mark IMS™ options, ensuring a fit for various setups.
- LIGHTWEIGHT DESIGN minimizes added bulk, allowing for agile handling without sacrificing performance.
- IRON SIGHT CO-WITNESS ensures continuous operation of the red dot sight, providing backup in case of battery failure.
- QUICK TRANSITIONS between magnified optics and red dots enable rapid target acquisition for dynamic shooting scenarios.
- RUGGED CONSTRUCTION guarantees durability, making it ideal for a lifetime of use in various shooting conditions.
- ADAPTABLE FIT for flat-top AR rifles with Picatinny rails, offering flexibility for different shooting styles.
- 45-DEGREE MOUNT OPTION enhances aiming versatility, providing a second point of aim without obstructing the primary sight.
- MADE IN THE USA with high-quality materials, ensuring reliability and performance in any environment.
Technical Specifications Table
Feature | Details |
---|---|
Mount Compatibility | 1" RDS® Mark 4® and Mark IMS™ |
Weight | Lightweight construction |
Material | Durable aluminum |
Height | Optimized for red dot sight |
Mount Type | Picatinny, Weaver, Cantilever |
Riser Option | Available for flat-top ARs |
Color | Matte Black |
What's in the Box?
- DeltaPoint Pro 1" Ring Top Mount Kit
- Installation instructions
Customer Reviews
"This mount fits perfectly on my AR and makes transitioning so easy!"
"I love the added security of the iron sight co-witness feature. It’s a must-have for reliability!"
"Super lightweight yet rugged. I trust it with my gear."
FAQ
1. How does the DeltaPoint Pro mount compare to other brands? The DeltaPoint Pro mount is designed for versatility and durability, providing options that cater to various shooting styles. Its lightweight design doesn't compromise on strength, making it a reliable choice for both AR and handgun setups.
2. Can I use this mount with other optics? Yes, this mount is compatible with various 1" RDS® systems, allowing you to tailor your setup to your preference. Ensure your optic is compatible with the RDS® Mark 4® and Mark IMS™ mounts for optimal performance.
3. Is the mount easy to install? The DeltaPoint Pro mount kit comes with clear installation instructions. Most users find it straightforward to set up on their firearms without professional assistance.
4. What maintenance does the mount require? Regularly check the mounting screws for tightness and inspect for any signs of wear or damage. Keeping the mount clean will ensure longevity and optimal performance.
5. Can I use this mount without the riser? Yes, the mount is designed to function effectively without the riser, making it suitable for a variety of setups depending on your specific requirements.
Similar Models
Looking for more versatile mounting solutions? Explore the complete Leupold lineup, including options like the Leupold Mark 4 IMS mount for enhanced adaptability and the Leupold VX-Freedom scope for precision shooting. Check out our full collection tailored to meet your shooting needs.
Our Guarantees
FREE Fast Shipping Over $99
Enjoy complimentary expedited shipping on all orders over $99.
Secure Payments
Shop with confidence using our encrypted payment processing.
High Quality or Money Back
Not satisfied with your purchase? We'll refund your money, no questions asked.
Top-Notch Support
Our expert team is available to answer all your questions and provide assistance.
What Our Customers Say
Optics Knowledge Center
Understanding Rifle Scope Basics
Magnification
Magnification refers to how much larger an object appears through the scope compared to the naked eye. Fixed power scopes have one magnification setting, while variable power scopes offer a range (e.g., 3-9x).
Objective Lens
The objective lens is the front lens that gathers light. Larger objective lenses (measured in mm) gather more light, providing brighter images in low-light conditions but add weight and require higher mounting.
Reticle
The reticle (crosshair) is the aiming point inside the scope. Modern scopes offer various reticle designs, from simple duplex crosshairs to complex ballistic reticles with holdover points for different distances.
Adjustments
Rifle scopes have turrets for windage (horizontal) and elevation (vertical) adjustments. These are measured in MOA (minutes of angle) or MRAD (milliradians) and allow precise aiming adjustments.
Proper Scope Mounting Guide
Select the Right Rings & Base
Choose rings that match your scope's tube diameter (typically 1", 30mm, or 34mm). Select a base compatible with your rifle's receiver. For heavy-recoiling rifles, opt for stronger mounts.
Install the Base
Clean the receiver and base thoroughly. Apply a small amount of blue Loctite to the screws. Attach the base to the receiver and torque the screws to manufacturer specifications.
Attach the Rings
Attach the bottom halves of the rings to the base. Place the scope in the rings and loosely attach the top halves. Don't fully tighten yet.
Set Eye Relief & Level
Position the scope for proper eye relief (3-4 inches) in your normal shooting position. Ensure the reticle is level using a scope leveling tool. Once positioned correctly, tighten the rings evenly in a cross-pattern.
Scope Zeroing Tips
Start Close
Begin zeroing at a shorter distance (25-50 yards) to ensure you're on paper before moving to your desired zero distance (typically 100 yards).
Use a Stable Rest
Always zero your rifle from a stable shooting position using a bench rest, sandbags, or a shooting rest to eliminate as much human error as possible.
Fire Groups
Fire 3-shot groups before making adjustments. This provides a more accurate representation of where your rifle is shooting than single shots.
Make Deliberate Adjustments
Know your scope's adjustment values (typically 1/4 MOA per click). If your group is 2 inches low at 100 yards, you'll need to adjust up 8 clicks (for a 1/4 MOA scope).
Confirm Your Zero
After making adjustments, fire another group to confirm your zero. Repeat the process until your point of impact matches your point of aim.
Document Your Settings
Once zeroed, record your settings including distance, ammunition used, and environmental conditions for future reference.
Optics Maintenance & Care
Cleaning Lenses
- Start by blowing or brushing away loose particles
- Use a lens pen or microfiber cloth for fingerprints
- For stubborn dirt, use lens cleaning solution (never household cleaners)
- Clean with gentle circular motions from center outward
Protecting Your Optics
- Always use lens caps when not in use
- Store in a dry place with silica gel packets
- Avoid extreme temperature changes
- Use a quality scope cover in harsh conditions
Regular Maintenance
- Check and tighten mount screws periodically
- Inspect O-rings and seals for damage
- Verify zero after rough handling
- Clean the exterior with a damp cloth
What to Avoid
- Never use fingers to touch lenses
- Avoid paper products (tissues, paper towels) on lenses
- Don't use acetone, alcohol, or household cleaners
- Never disassemble your scope (voids warranty)