LaserMax Micro II Rail Mounted Laser - Fits 3/4? Length Rail & Up - Green Laser
Regular price
$110.59
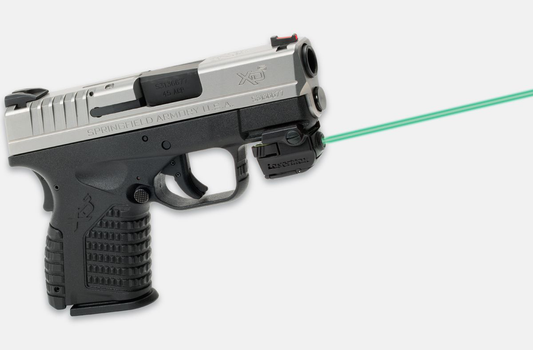
LaserMax Micro II Rail Mounted Laser is built for precise targeting, fitting firearms with a 3/4" length rail and larger. With its bright green laser, this compact accessory enhances visibility for quick target acquisition, whether you're at the range or out hunting. Weighing just half an ounce and measuring under one inch, it adds minimal bulk while ensuring durability against recoil, maintaining accuracy shot after shot.
The innovative Quick Change Battery Hatch™ allows for swift battery replacements, while the automatic battery preservation mode prevents unnecessary drainage. The ambidextrous switch is designed for ease of use by both left and right-handed shooters, ensuring a user-friendly experience in any situation.
| Specification | Details |
|---|---|
| Length | Less than 1 inch |
| Weight | 0.5 oz |
| Material | Reinforced housing |
| Battery Life | Over 1 hour |
| Compatibility | 3/4" length rail & up |
“I love how compact the LaserMax Micro II is; it fits perfectly on my pistol without adding bulk!” – Alex R.
“The green laser is incredibly bright! I can spot my targets even in low light conditions.” – Jenna T.
“Easy to install and the battery swap feature is a game changer. Highly recommend!” – Mark P.
How does the LaserMax Micro II perform in low-light conditions? The bright green aiming point is designed for high visibility, making it ideal for use in low-light or dusk conditions, ensuring you can quickly acquire your target.
What firearm models are compatible with the LaserMax Micro II? The LaserMax Micro II fits a variety of pistols with a 3/4" length rail and up, making it compatible with a broad range of compact and subcompact models.
Is the battery easy to replace? Yes! The Quick Change Battery Hatch™ allows for quick and safe battery swaps without removing the laser from your firearm.
Looking for more precision optics? Explore our complete LaserMax collection to find complementary products that enhance your shooting experience. For example, check out the LaserMax Guide Rod Laser for an even more streamlined option. Discover the full lineup today!
Here’s some of our most similar products people are buying. Click to discover trending style.