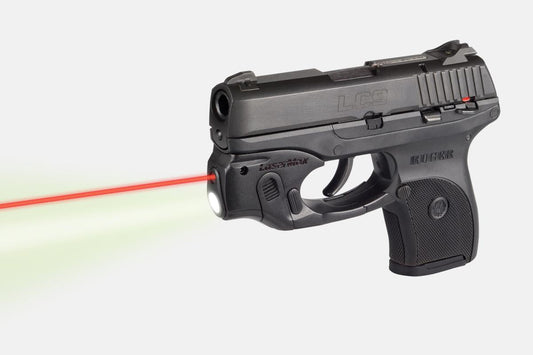
LaserMax CenterFire Light & Laser w/GripSense for Ruger LC9/LC380/LC9S Red
Regular price
$134.69
LaserMax CenterFire Light & Laser w/GripSense for Ruger LC9/LC380/LC9S Red offers immediate activation through its GripSense Technology, which detects your grip and turns on the laser and light automatically. This system ensures a swift response in critical moments, enhancing your shooting experience without fumbling for buttons. The bright 100-lumen mint green light paired with a precise red laser provides improved visibility, aiding in quick target acquisition, even in low-light situations.
Designed for both right and left-handed users, this ambidextrous unit ensures comfortable handling. Installation is straightforward and does not require permanent modifications to your firearm. The dual activation options—GripSense and push-button—allow for personalized use. Additionally, the system features fully adjustable windage and elevation controls, enabling precise aim adjustments. Tool-less battery access simplifies maintenance, making it easy to keep your device operational when needed.
| Feature | Details |
|---|---|
| Beam Color | Mint Green Light with Red Laser |
| Light Output | 100 Lumens |
| Activation Type | GripSense & Push Button |
| Adjustments | Windage and Elevation |
| Weight | Lightweight |
| Dimensions | Custom fit for Ruger LC9/LC380/LC9S |
"This is a game-changer! The LaserMax CenterFire activated perfectly every time, making it feel more intuitive." - Alex M.
"I’ve noticed a significant improvement in my accuracy since adding this to my Ruger." - Jamie T.
"Easy to install and use. The grip activation is a fantastic feature!" - Chris R.
How does GripSense Technology work?
GripSense Technology senses your grip on the firearm and activates the light and laser immediately, allowing for faster response times without needing to press any buttons.
Can the GripSense feature be disabled?
Yes, the LaserMax CenterFire allows you to disable the GripSense activation, reverting to a classic push-button activation for user preference.
Is the LaserMax CenterFire compatible with all Ruger models?
This model is specifically designed for Ruger LC9, LC380, and LC9S. Ensure compatibility with your firearm before purchasing.
Looking for the perfect companion for your Ruger? Explore our complete LaserMax lineup, including models like LaserMax Guide Rod Laser for Glock for enhanced concealment and accuracy. Discover the entire collection tailored to your shooting needs!
Here’s some of our most similar products people are buying. Click to discover trending style.