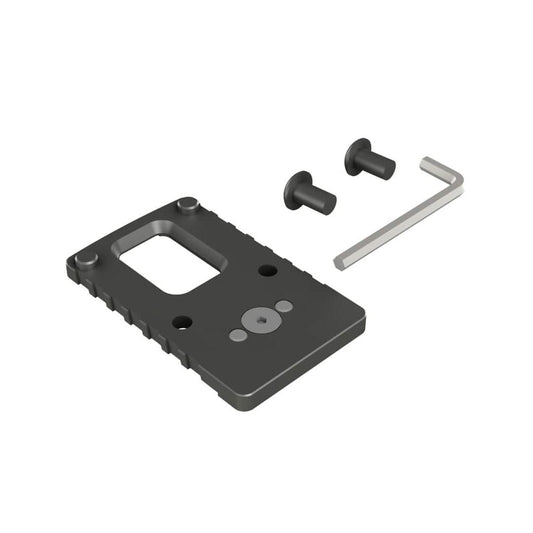
Canik Optic Base Plate (C) for Non Optic Ready Pistols Black allows for the mounting of compatible optics like the Trijicon RMR on your non-optic ready Canik firearms. Designed specifically for models such as the TP9 V2 and TP9 SA, this base plate provides a solid foundation for precision shooting. The straightforward installation process ensures you can enhance your firearm without the need for professional gunsmithing.
With this base plate, target acquisition becomes more efficient, allowing for better performance in both bright and low-light conditions. Users can expect improved accuracy whether at the shooting range or during tactical training scenarios. Equip your Canik pistol with this base plate for a versatile and effective addition to your shooting experience.
| Feature | Details |
|---|---|
| Compatibility | TP9 V2, TP9 SA, TP9 DA, TP9 SA MOD 2, TP9 SF, TP9 SFT, TP9 SFL |
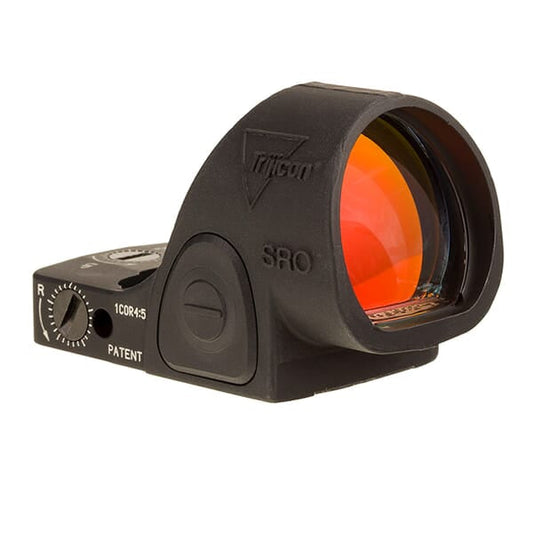
| Optic Compatibility | Trijicon RMR |
| Material | High-Quality Polymer |
| Weight | Lightweight |
| Color | Black |
“This base plate transformed my shooting experience! Easy to install and fits perfectly on my TP9.”
“I love the versatility it adds. My accuracy has definitely improved since using the RMR.”
How do I install the Canik Optic Base Plate? The installation process is straightforward and can be done with basic tools. Simply follow the included user manual for step-by-step instructions.
Will this fit my non-optic ready Canik model? The Canik Optic Base Plate (C) for Non Optic Ready Pistols Black is compatible with various TP9 models. However, it does not fit optic-ready Caniks or specific models like the TP9 Elite Combat.
Looking for more ways to enhance your shooting setup? Explore our complete collection of Canik accessories to find the perfect upgrades for your firearms. Don't miss out on the opportunity to elevate your performance!
Here’s some of our most similar products people are buying. Click to discover trending style.